


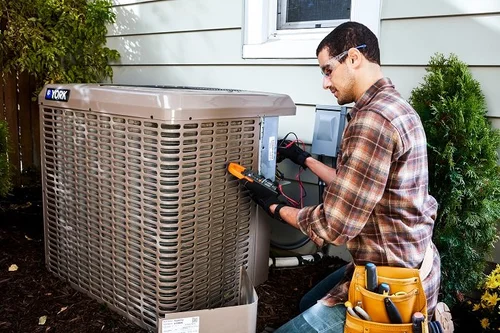
Rancho Cordova summers bring long, hot afternoons and extended operating hours for cooling equipment. Replacing or adding central air involves more than choosing a brand or comparing SEER2 ratings. The comfort you experience in July and August depends heavily on decisions made before anyone places a condenser on a pad. Correct system capacity, ductwork that can move the required airflow, and outdoor equipment positioned where it can breathe properly are all essential. These choices can determine whether a system provides steady, quiet cooling or struggles whenever temperatures rise sharply.
-
Properly Size the System With Manual J and Sacramento Valley Heat
If you are comparing models or researching AC installation in Rancho Cordova, start by asking for a room-by-room Manual J load calculation. Square foot rules of thumb do not account for insulation levels, window area and orientation, shading, or air leakage. These factors influence the sensible cooling load a system must handle when Sacramento Valley heat continues late into the day. Matching equipment capacity to the calculated load helps the air handler deliver the required airflow in cubic feet per minute per ton. It also allows the thermostatic expansion valve and refrigerant charge to operate as intended.
Oversizing may sound like a safe choice, but it can create problems. A large single-stage system may cycle on and off too frequently, which can waste energy, increase operating noise, and leave rooms with uneven temperatures during the late afternoon. An undersized system may run continuously and allow indoor temperatures to rise during periods of extreme heat. Variable-speed and two-stage compressors can improve comfort during milder conditions while still meeting peak cooling demand, but they require compatible controls and proper setup. The goal is to choose calculated capacity and equipment staging that match how the home gains heat throughout the day.
-
Check Your Ducts for Static Pressure, Leakage, and Return Air Sizing
New equipment cannot compensate for inadequate airflow. Ask for a duct inspection that includes total external static pressure measurements and checks for kinks, crushed flex ducts, and undersized return ducts. High static pressure forces the blower to work harder, reduces delivered airflow, and can affect coil performance. In older homes, one undersized return can restrict an otherwise capable three-ton system. Sealing duct joints with mastic and adding an appropriately sized return can improve airflow without changing the cooling equipment.
Leakage in attic ducts releases cooled air into one of the home’s hottest areas. This can make a properly sized system feel inadequate even when the condenser and indoor coil are correctly matched. Consider a 1970s ranch with leaking register boots and pinched flex ductwork. A new variable speed air handler may still leave bedrooms uncomfortable if static pressure remains high and a large portion of conditioned air escapes into the attic. Repairing damaged elbows, increasing the size of a return plenum, and adjusting balancing dampers can turn a struggling installation into a quieter, more consistent system.
-
Place the Condenser Wisely for Airflow, Shade, and Noise Control
Outdoor units must release heat efficiently, so they need adequate space and unrestricted airflow. Keep the condenser coil clear on all sides and provide enough room for service access and proper air intake. Avoid placing the unit in a tightly enclosed area or directly behind dense shrubs, as these conditions can cause hot discharge air to circulate back through the coil. A level equipment pad positioned away from dryer vents and irrigation spray can also reduce vibration, dirt accumulation, and fin blockage that may increase operating pressure.
Shade can help during hot afternoons, but unrestricted airflow is more important. A lattice screen positioned several feet away, or on the north or east side of the home, may help as long as you maintain manufacturer clearance requirements. Noise should also be considered. A condenser placed in a tight corner near a neighboring wall may amplify sound. In townhomes, hiding a unit behind a solid privacy fence can look attractive, but trapped heat may increase operating time and noise. Prioritize open airflow and proper clearance, then add limited shade only when it does not interfere with either.
-
Verify Electrical Power, Controls, and Refrigerant Lines
Before installation day, confirm that the electrical panel can support the required breaker size and that an outdoor disconnect is present and accessible. Many higher-efficiency systems use variable-speed blower motors and multistage compressors that perform best with compatible thermostat controls and a dependable C wire. If you plan to replace a traditional air conditioner with a heat pump, you may need additional thermostat conductors to control auxiliary heat and defrost functions.
The refrigerant line set also requires careful evaluation. Long runs, unnecessary bends, and incorrect pipe diameters can reduce system performance. Reusing an existing line set can save labor, but contamination from an older system may threaten a new compressor. Replacing the line set requires additional work but may reduce future risk. At minimum, the refrigerant circuit should receive a proper nitrogen pressure test, deep evacuation, and filter drier installation. The condensate drain also deserves attention. A properly configured trap, float switch, and safe discharge location can help protect ceilings, closets, and surrounding areas during extended periods of cooling operation.
Plan for Wildfire Smoke With Filtration and Sealing
Wildfire season can overlap with periods of extreme heat. When smoke reaches the Sacramento Valley, the air conditioner may recirculate indoor air for long periods. A MERV 13 media filter can improve fine particle capture, but stronger filtration may also increase pressure drop. To avoid restricting airflow, pair higher-efficiency filtration with adequate filter surface area and a blower that can handle the added resistance. A four-inch media filter generally provides more surface area than a one-inch filter, which can reduce airflow restriction while helping keep particles away from the indoor coil.
When outdoor air quality is poor, reducing uncontrolled outdoor air entry becomes especially important. A return plenum located in a hot attic can pull smoky air through unsealed joints and spread odors throughout the home. Sealing return seams and improving weatherstripping around attic access points can reduce this problem. During severe smoke events, whole-house filtration may be supplemented with portable HEPA air cleaners in bedrooms and other occupied spaces. You can resume normal ventilation after outdoor air quality improves.
Successful AC installation in Rancho Cordova depends largely on decisions made before installation. Request a Manual J load calculation, have the duct system evaluated and sealed as needed, choose a condenser location with sufficient airflow, and ensure the electrical system, thermostat wiring, and refrigerant lines match the new equipment’s requirements. During system startup, proper commissioning should include checking total external static pressure, verifying airflow in cubic feet per minute per ton, and confirming appropriate refrigerant measurements. After installation, keep the filter clean, keep the condenser coil clean, and monitor the condensate drain during extended operation. These steps can help the system perform closer to its rated capacity during Rancho Cordova’s hottest days.

